A sensor on the network
The step from An LED and a button to a connected device: you read a sensor, measure it every so often and send the value over the internet with MQTT, the messaging protocol of many IoT devices. The sensor is a potentiometer, a knob you turn: on Windows, the one in the GPIO simulator; on your board, a real one or any sensor that gives a voltage.
As before, each program goes in the main file of your project, in place of what it has.
Read an analog value
use GPIO

const PIN_SENSOR = 34                    // a pin with an analog converter (ADC)

for (var reading = 1; reading <= 10; reading++)
    var value = GPIO.aread(PIN_SENSOR)                 // from 0 to 4095
    var percent = value * 100 div 4095
    println("Value: ", value, "  (", percent, " %)")
    pause(500)
end
GPIO.areadreads the voltage on the pin with the analog converter (ADC) and gives it as a number from 0 (0 V) to 4095 (the maximum voltage). A potentiometer gives more or less as you turn it.divis integer division:value * 100 div 4095gives the percentage with no decimals.
On Windows:
-
In the simulator (Build › Debug › GPIO Sim), add pin
34with Add GPIO Pin and connect it to Potentiometer. -
Click Run and, while the program prints, turn the knob on the card. Each line comes out with the value of the moment, for example:
Value: 0  (0 %)
Value: 1365  (33 %)
Value: 4095  (100 %)
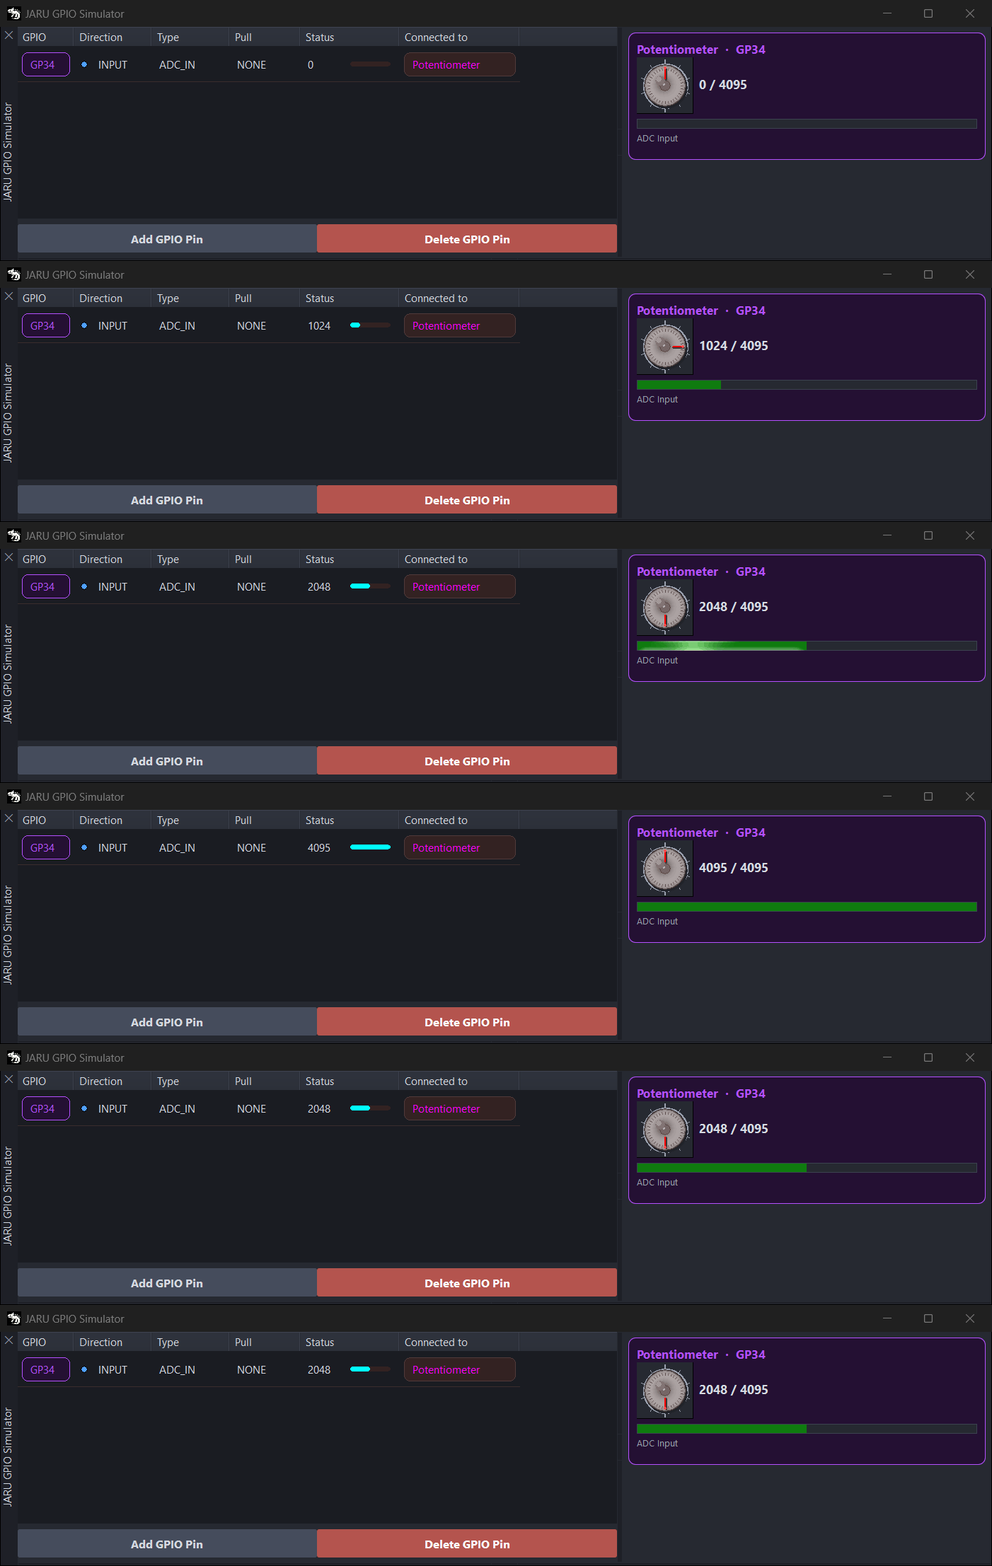
When it starts, the VM sets every pin to zero: until you touch the knob, the program reads 0, even if the card shows another value.
Measure every second, with a timer
In a real device, the program does not end: it measures every so often, forever. That is what Timer is for.
use GPIO
use Timer

const PIN_SENSOR = 34

func measure(id, periodic, data)
    var value = GPIO.aread(PIN_SENSOR)
    println("Value: ", value, "  (", value * 100 div 4095, " %)")
end

Timer.every(1000, measure)           // measure() every second
while (true)
    pause(10)                        // timers fire between pauses
end
Timer.every(1000, measure)callsmeasureevery 1000 milliseconds. The function receives three things: the timer number, whether it is periodic and a value that is not used here.- The program stays alive in the
while (true). Timers fire at safe moments of the program, such as when a loop goes round, never insidepause(): that is why the pauses in the loop are short.
Click Run: one line comes out every second, with what the potentiometer reads. To finish, click Stop.
Send it with MQTT
With MQTT, the program publishes each value on a topic, a name such as home/living-room/temperature, on a server that hands them out: the broker. Whoever is subscribed to that topic, anywhere, receives the value. Here the program subscribes to its own topic, so you see what it sends come back.
The connection to the broker is not opened from the program. On Windows:
- Open Config › Platform › Windows. In the MQTT section, turn on Enable MQTT. The default broker is
test.mosquitto.org, a free public one, on port1883. - Click Save Config.
use GPIO
use Timer
use MQTT

const PIN_SENSOR = 34
const TOPIC = "jaru/getting-started-test/sensor"   // change it to a topic of your own

func onMessage(topic, message)
    println("Received from ", topic, ": ", message)
end

func measure(id, periodic, data)
    var value = GPIO.aread(PIN_SENSOR)
    MQTT.publish(TOPIC, value.toString())
    println("Sent: ", value)
end

println("Waiting for the broker...")
while (not(MQTT.isConnect()))
    pause(100)
end
println("Connected")

MQTT.callback(onMessage)
MQTT.subscribe(TOPIC)
Timer.every(2000, measure)           // a value every 2 seconds
while (true)
    pause(10)
end
- Change the topic to one of your own, with something nobody else uses, such as your name: on a public broker, anyone can read and write on any topic.
MQTT.isConnect()says whether there is a connection. The program waits for it before subscribing.MQTT.callback(onMessage)says which function receives the messages, andMQTT.subscribesubscribes to the topic.MQTT.publishsends the value, as text:toString()converts the number.
Click Run. Every two seconds, the program sends the value of the potentiometer, and it comes straight back from the broker. The console shows this, plus a line from the Windows VM itself when it subscribes, which starts with Subscrito a:
Waiting for the broker...
Connected
Sent: 0
Received from jaru/getting-started-test/sensor: 0
Sent: 0
Received from jaru/getting-started-test/sensor: 0
MQTT messages reach onMessage the way timers fire: at the safe moments of the program, never inside pause(). A program that waits for messages goes round with short pauses.
On the board
- Wire the potentiometer: its ends to 3.3 V and to GND, and the middle leg to a pin of your board with an analog converter. Which ones have an ADC, in your board's schematic; on the ESP32-P4, only those of ADC1 read, and on the ESP32-S31
GPIO.areadgives the raw value of its ADC, on another scale (see GPIO). ChangePIN_SENSORto yours: the 34 of the example is an ESP32 one, and on the ESP32-S3 pins 33 to 37 belong to its PSRAM (see Pins you cannot use for a button). - Set up the board's network on the Network page of ESP32 Tools: under WiFi, turn on Enable WiFi and put your network's name and password in SSID and Password; under MQTT, turn on Enable. The default broker is also
test.mosquitto.org. Every field, in Display, sound, SD and network. - With your board in Target, click Run and open the serial monitor.
Before your program, the serial monitor shows how the board connects: «Connecting to», with your network, and «WiFi connected» with its IP address. It connects to the broker later, with the program already running: that is why the program waits for MQTT.isConnect() before subscribing.
When the board reconnects to the broker, it does not repeat your subscriptions: messages stop reaching onMessage, even though the values are still being sent. To keep receiving, subscribe again when MQTT.isConnect() gives true again.
Next steps
- Draw and move: the display, the loop of a game and the buttons.
- MQTT module: publishing, subscribing, topic wildcards and messages in JSON.
- Timer module: one-shot and periodic timers, and how to stop them.
- Display, sound, SD and network: the board's WiFi and MQTT, field by field.