Your program on a board
In this walkthrough you take a program to an ESP32 board: you choose the board in the IDE, write the JARU VM to it, send it the program with Run and see what it prints in the serial monitor.
You need a board from the profile list that comes with JARU IDE, its USB cable and a project: the one from Your first program or a new one, created with New Project.
Connect the board and choose it
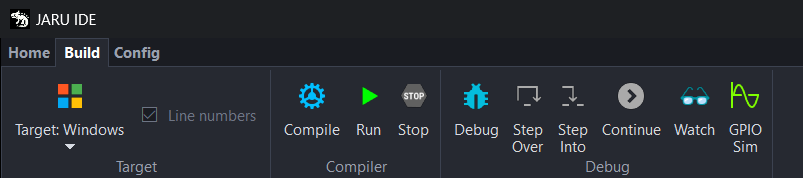
- Connect the board to the computer over USB.
- In the Build tab, click the Target: Windows button and choose Manage boards.... ESP32 Tools opens: the window for the project's boards (the same one as Config › Platform › ESP32).

- At the top, Device shows the project's board, the one you are going to set up. If the project had none, ESP32 Tools has just created one: Default ESP32.
- In Hardware Profiles, choose your board's profile and click Apply. The profiles are named after the board's brand and model, and below the list there is a summary: the chip, the display, the SD card and the sound.
- Click Scan Ports. The IDE looks for the serial ports, lists them in the Output and picks in Port the one that looks most like a board: a USB one. Check that it is yours.
- In Name, give it any name you like, and click Save Device: the board is saved in the project.
- Click the Target button again: your board is in the menu, with its chip and its port. Choose it. The button now shows its chip, for example Target: ESP32-S3.
From now on, Run takes the program to that board. To go back to Windows, choose Windows x64 in the same menu. The target is saved with the project. The whole Target group: The interface.
Flash the VM firmware
The board needs the JARU VM to run your programs. You write it once, and again every time you update JARU IDE.
- In the left column of ESP32 Tools, click Deploy, under Actions. At the top, Deploy Summary sums up what the board is going to be written with: the chip, the port, the flash size, the program… and warns about anything missing.
- Click Flash Firmware.
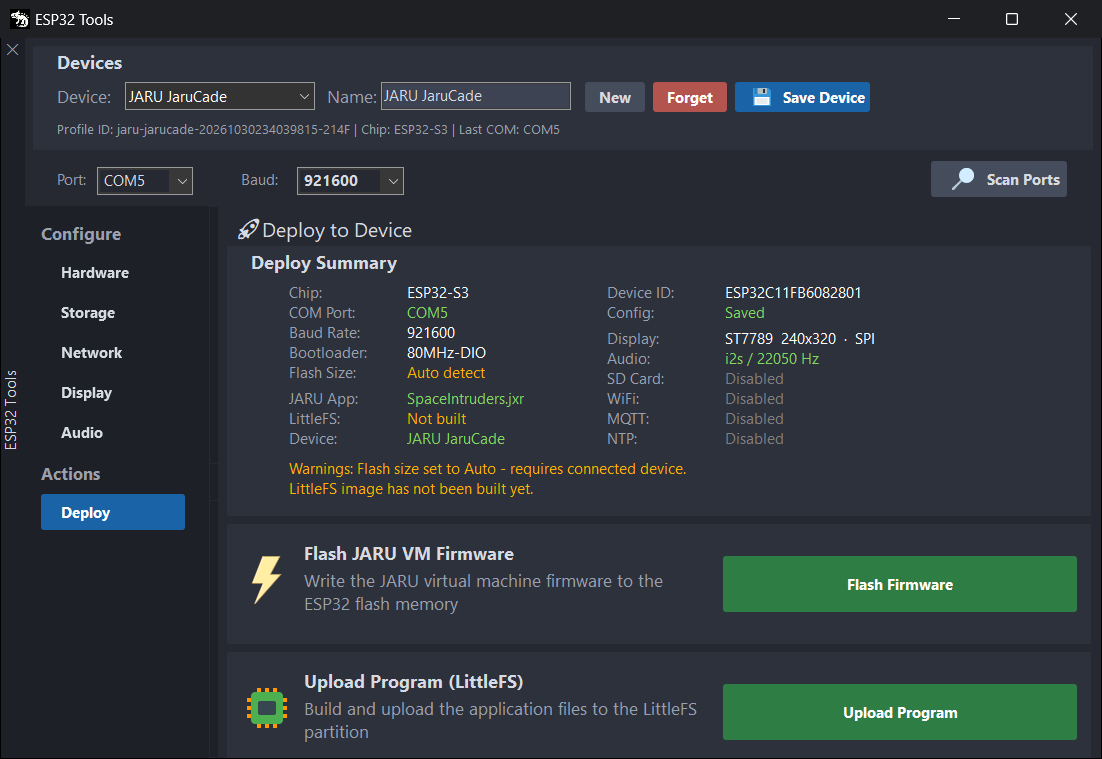
The IDE reads the size of the board's flash memory and writes to it the JARU VM for its chip, the one that comes with the installation, with its bootloader and its partition table. The Output tells you how it goes (“Flashing in progress... 45%”) and, at the end, says “JARU VM firmware successfully saved.”. Then the board restarts.
If your board came with a factory program, or one of yours written with another tool, Flash Firmware replaces it with the JARU VM. JARU IDE doesn't keep a copy of what was there.
You don't need to write the VM before the first Run: if the board doesn't carry it, Run offers to write it (see Run on the board).
Run doesn't notice if the board carries the VM of an older version of JARU: its check accepts it. On a board with the 0.9.6 VM, a program compiled with 0.9.7 stops at the first new instruction with the error “Unknown Opcode encountered”. After updating JARU IDE, click Flash Firmware on each board before sending it programs (see When you change version and Upgrading from 0.9.6).
Run on the board
Write this program in the project's main file, replacing what is there, and save it (Ctrl+S):
// One line per second, five times
for (var lap = 1; lap <= 5; lap++)
    println("Hello from the board: lap ", lap)
    pause(1000)
end
println("Done")
It prints this:
Hello from the board: lap 1
Hello from the board: lap 2
Hello from the board: lap 3
Hello from the board: lap 4
Hello from the board: lap 5
Done
With your board in Target, click Run. If the program isn't built, or you have changed the code since the last time, the IDE builds it first. If ESP32 Tools has unsaved changes, such as the flash size it has just read from the board, Run first asks whether to save them (“The ESP32 configuration has unsaved changes”): answer Yes.
Then the Output goes through the three steps of the upload:
- It prepares the files for the board (“Step 1 of 3”). It reads the size of the board's flash and puts into an image the compiled program, its resources and the
boot.cfg, the file that tells the VM what the board is like and which program to start. - It checks that the board carries the JARU VM (“Step 2 of 3”). If it does, the Output says “The board carries the JARU VM.”.
- It writes the program and its files to the board (“Step 3 of 3”). Erasing the space for the files takes a while: meanwhile, the Output writes a line every 10 seconds (“... still working, 20 s so far”).
When it's done, the Output says “DEPLOYMENT COMPLETED: LittleFS successfully built and flashed.”. The board restarts and starts your program. What it prints doesn't show up in the Output: to see it, open the serial monitor (See what it prints).
Step 3 rewrites the board's whole file memory, not just the program. Anything your program saved there is lost with every Run, and with Upload Program too.
If in step 2 the board doesn't carry the VM (it is empty or carries another firmware), Run asks what to do before writing anything, in the Run on the board window:
| Button | What it does |
|---|---|
| Yes | Writes the VM first, like Flash Firmware, and then the program. This is what you want. |
| No | Writes the program anyway. Without the VM, the board keeps restarting over and over. |
| Cancel | Writes nothing. |
Also:
- Upload Program, on the Deploy page of ESP32 Tools, also sends the program, but it doesn't build it first, doesn't check that the board carries the VM and doesn't move the serial monitor aside, so close it first. Use Run.
- Debug doesn't go to the board: it always debugs on the Windows VM.
- The program stays on the board until you send it another one. Stop doesn't stop it: it only stops programs running on Windows.
See what it prints
What your program prints on the board comes out through its serial port, and the Output shows it with the serial monitor. Run doesn't open it: open it yourself.
- In the Output toolbar, check that Port is your board's port and that Speed is 115200, the speed the VM writes at. If the Target is your board and you haven't picked another port, Open Serial uses the board's.
- Click Open Serial. The Output says “Serial port opened (COM5)”, with your port, and from then on shows whatever comes from the board.
Every time the program starts, the VM first writes some lines of its own, with a banner that carries its version; then come your program's. When the program ends, the board's VM starts it again: you'll see its six lines over and over.
To close the monitor, click Close Serial, which is the same button.
If the monitor is open when you click Run or Flash Firmware, the IDE moves it aside while it writes to the board (“Serial monitor paused: the IDE is using COM5.”) and opens it again when it's done. You don't have to click Open Serial again.
How the monitor works: The Output and the serial monitor.
If it does not start
- “Error: No COM port configured. Please open ESP32 Tools and select a port.” The project's board has no port. In Manage boards..., click Scan Ports, choose your board's in Port and click Save Device. With Flash Firmware, the message is “No COM port has been selected. Please select a valid COM port to proceed.”.
- “DEPLOYMENT FAILED” in the Output, or “Error: failed to save JARU VM firmware.” with Flash Firmware. The IDE couldn't write to the board, and the esptool lines above say why. The warnings “Warning: Could not auto-detect flash size.” and “Could not read the board to check it: sending the program anyway.” mean that it couldn't even read it. Check that the board is connected and that Port is its port: click Scan Ports again.
- The board keeps restarting. It carries your program but not the VM: it happens if you answer No in Run on the board. Click Flash Firmware and then Run.
- The serial monitor says “File "boot.cfg" not found. System halted.” The board carries the VM, but no program yet: click Run.
- The program stops with “Unknown Opcode encountered”. The board carries the VM of an older version of JARU: click Flash Firmware (see Flash the VM firmware). A 0.9.7 VM that gets a program from a newer version turns it down with another message, which asks to “Update the firmware from the IDE”: do the same.
- The program gives an error. The serial monitor shows the error and, if Line numbers is on, its line. If the error stops the program, the VM starts it again, and the error repeats until you fix it and click Run again.
- The program keeps waiting.
readLine()gets nothing on the board: the serial monitor doesn't send what you type (see readLine and Memory and limits).
There are more cases in If the board does not start.
All the known issues of JARU, together, are in Known issues.
Next steps
- An LED and a button: turn an LED on and toggle it with a button, in the Windows GPIO simulator and on your board.
- Draw and move: the board's display, an animation and its buttons.